

connector
connector
has keyway


curve at top

screws


Avio 1 Hardware Upgrades
Replacing Hard drive
After removing power and connecting cables turn Avio upside down. Remove 4 Phillips
screws from the outer edge of the metal plate. Lift out the plate and hard drive
attached to the other side. Carefully remove flat IDE cable by levering each side
and noting the keyway on the connector. Remove power connector noting one side is
curved. Remove 4 screws from other side of metal plate securing drive. Before fitting
new drive ensure that the small jumper between the drive connector is set to Master.
There should be an illustration on the hard drive label. Fit drive to plate and re-
Connect power cable and Scart Lead to monitor. You will now need the Operating System SmartMedia card. Insert card into card slot copper side down with machine switched off. Press on/off button and follow onscreen instructions. Remove card when requested and Avio will boot up to main menu. If you have purchased additional software you must now install this from your software demo SmartMedia card. Go to System Settings, Install Products and insert card. Avio will read the card and display the contents in the Install box. Select each product in turn that you have previously purchased and press Activate. No licence number is required. When all products are installed press OK and remove card.
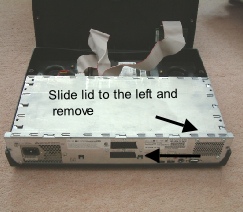
After removing power and connecting cables turn Avio upside down. Using a Phillips head screwdriver, remove 4 screw s, 2 from each side. (A magnetic screwdriver is useful here). Holding top and bottom parts of the cabinet together return Avio to upright position and carefully lift off top half of cabinet. Note Card reader cable still attached.
Replacing RAM
Replace metal lid by locating lugs and sliding to the right and re-
Remove RAM strip and replace with new one noting two keyways. Press down firmly and the two slips will snap back into their locked position.
Keyway